I’ve been doing R/Java development for some time, creating packages both large and small with this tool chain. I have used Eclipse as my package development environment almost exclusively, but I didn’t realize how much I relied on the IDE before I had to do some serious R/C++ package development. My first Rcpp package (wordcloud) only used a little bit of complied code, so just using a standard text editor was enough to get the job done, however when I went on to a more complex project, TextWrangler just wasn’t cutting it anymore. Where was my code completion? Where were my automatically detected syntax errors?
I found myself spending more time looking up class APIs, fixing stupid errors, and waiting for R CMD INSTALL to finish than I did coding. Unfortunately the internet did not come to the rescue. I searched and searched but couldn’t find anyone who used a modern IDE for package development with compiled code. In particular I wanted the following features.
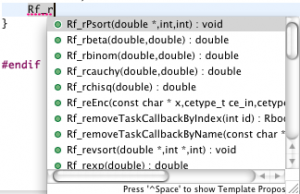
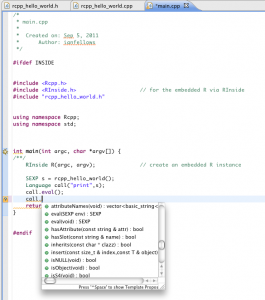
- Code completion. What methods does that class have again? What arguments does that function take? Perhaps everyone is just smarter than me, but I can’t seem to keep the whole R/Rcpp API in my head. I just want to hit ctrl+space and see what my options are:
- Syntax error detection. Oh, I meant hasAttribute. Whoops, forgot that semicolon again.

- Incremental builds. It takes a long time for R CMD INSTALL to complete. The package that I am currently working on takes 2 minutes and 30 seconds to install. I don’t want to have to wait for a full install every time I make a small change to a function I am playing with.
- R and C++ syntax highlighting. Editing good looking code makes for a better coding experience.
The solution I found is a combination of Eclipse, Rcpp and RInside. Rcpp is undeniably the best way to embed high performance C++ code within R. It makes writing C++ code with native R objects a breeze. Even John Chambers is unhappy with the lack of elegance in the R/C interface. Rcpp uses some of the more advanced language features in C++ to abstract away all of the ugliness. RInside on the other hand embeds R within a C++ program.
The steps below will show you how to link up Eclipse with Rcpp to get code completion and syntax error detection, then RInside will be used to link up R with Eclipses build and run systems allowing for incremental building and rapid prototyping.
Step 1: Download Eclipse
You will need to download the CDT version of eclipse for c/c++ development. It can be obtained at http://www.eclipse.org/cdt/.
Step 2: Install statet
statet is an eclipse plug-in supporting R integration. Follow the installation instructions at http://www.walware.de/goto/statet. R will need to be configured, which is covered in section 3 of Longhow Lam’s user guide.
Step 3: Install Rcpp and Rinside
In R run:
install.packages(c("Rcpp","RInside"),type="source")
Step 4: Create a skeleton for a new C++ project
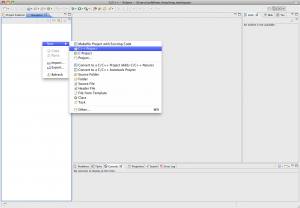
- Right click on the Navigator area and select New -> C++ Project.
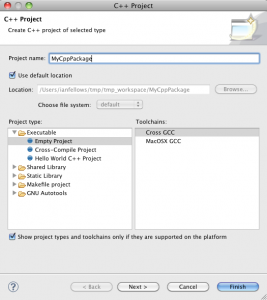
- Name the project MyCppPackage and click Finish.
- In R create a cpp package skeleton with the following code:
library(Rcpp)
Rcpp.package.skeleton("MyCppPackage")
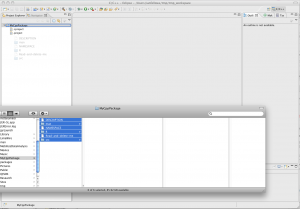
- In the file system navigate to your R working directory. There you should find a new folder labeled MyCppPackage. Drag the contents of that folder into your project in eclipse.
Step 5: Making the package installable
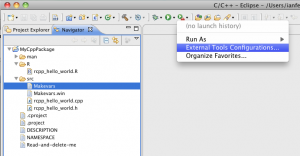
Open the external tools configurations and create a new statet R CMD Tools configuration for R CMD INSTALL. Change the directory from resource_loc to project_loc. Note, you will probably want to also add the command line argument “–clean” so that temporary files created during the install process are removed. If you want the fastest possible installation, use “–no-test-load –no-multiarch –clean”.
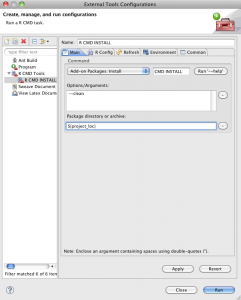
Your shiny new Rcpp project should now be installable with the click of a button. Run the configuration (you should an install log in the console) and check that the package is now loadable by running library(MyRcppPackage) in R.
Step 6: Setting up links and properties
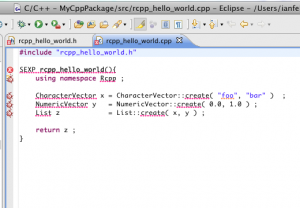
Now eclipse knows how to install the package, but it doesn’t know what any of the symbols in your C++ files mean because it can’t see the Rcpp package. If you look at the rcpp_hello_world.cpp file you should see a bunch of bugs.
In this step we will set up the project properties necessary for Eclipse to link up with R, Rcpp and RInside. There may be a few things that you need to change for your system. Notably, the directories listed below all start with /Library/Frameworks/R.framework/Resources. This is the default R_HOME for Mac OS X. If your R home is located in a different place, or you have a user library directory where Rcpp and RInside are installed, you will need to edit the directories accordingly. Also, the architecture for my R is x86_64, so if your architecture is different, you will need to change this.
- Right click on MyCppPackage and select properties.
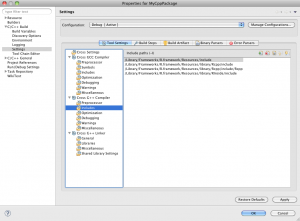
- Add references to the header files for R, Rcpp and RInside to the G++ compiler includes.
/Library/Frameworks/R.framework/Resources/include
/Library/Frameworks/R.framework/Resources/library/Rcpp/include
/Library/Frameworks/R.framework/Resources/library/RInside/include
(note: these may be different on your system depending on your R_HOME and library paths)
(edit: I’ve removed the include directive for the /Rcpp/include/Rcpp directory as it is not needed and can lead to conflicting references for string.h on case-insensitive operating systems).
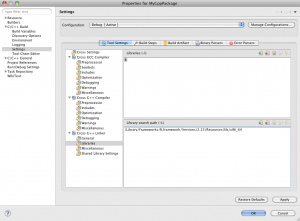
- Add a reference to the R library to G++ linker – Libraries.
/Library/Frameworks/R.framework/Resources/lib/x86_64
(note: if you are not using the x86_64 arch, replace this with the appropriate architecture.)
- Add linkages for the RInside library to the G++ linker – Miscellaneous
/Library/Frameworks/R.framework/Resources/library/RInside/lib/x86_64/libRInside.a
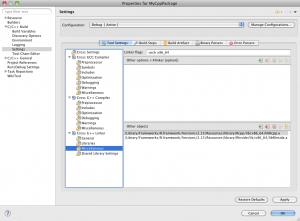
(edit: I’ve removed the reference to Rcpp/lib/x86_64/libRcpp.a as Rcpp is header only (as of 0.11.0))
- Add the “-arch x86_64” architecture flag for g++ compiler. This option is found in the Miscellaneous settings. If your computer’s architecture is different, set the flag accordingly.
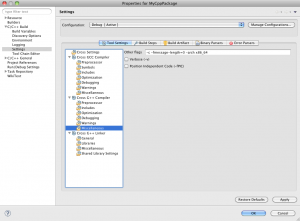
- Set the g++ Compiler – Preprocessor symbol INSIDE. This is used in the main.cpp file in the next section.
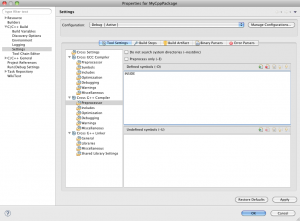
Step 7: Enabling building and launching
- Create a new c++ file main.cpp in the src folder with the following code
#ifdef INSIDE
#include <Rcpp.h>
#include <RInside.h>                    // for the embedded R via RInside
#include "rcpp_hello_world.h"
using namespace Rcpp;
using namespace std;
int main(int argc, char *argv[]) {
    RInside R(argc, argv);              // create an embedded R instance
    SEXP s = rcpp_hello_world();
    Language call("print",s);
    call.eval();
    return 0;
}
#endif
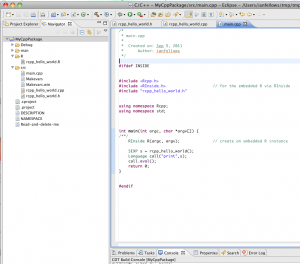
- Execute Project – “Build All”. You should see the project building in the eclipse console, ending with **** Build Finished ****.
- Next, go to Run – “Run Configurations”.
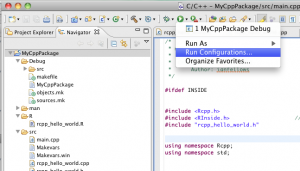
- Create a new C++ run configuration set to launch the binary Debug/MyCppPackage
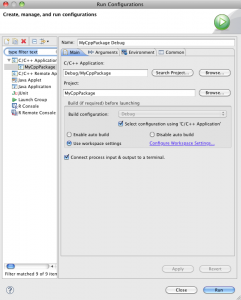
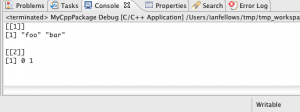
- Hit run. You should then see the binary building and running. The output of main.cpp will be emitted into the Eclipse console. This allows you to do rapid prototyping of c++ functions even if they require the full functionality of R/Rcpp.
 You can also make use of Eclipse’s extensive and very useful code sense to both detect errors in your code, and to assist in finding functions and methods. ctrl+space will trigger code completion
Final thoughts
Rcpp has made R package development with C++ code orders of magnitude easier than earlier APIs. However, without the features modern IDE, the developers life is made much harder. Perhaps all the old school kids with Emacs/ESS have trained their brains to not need the features I outlined above, but I am certainly not that cool. I found that I was at least 4-5 times more productive with the full Eclipse set-up as I was prior.
After following the steps above, you should have a template project all set up with Eclipse and are ready build it out into your own custom Rcpp based package. These steps are based on what worked for me, so your milage may vary. If you have experiences, tips, suggestions or corrections, please feel free to post them in the comments. I will update the post with any relevant changes that come up.
Update: Windows users may find this SO helpful
————————————–
Fellows Statistics provides experienced, professional statistical advice and analysis for the corporate and academic worlds.


